Nutella Hot Chocolate

Nutella Hot Chocolate

hot cocoa 028

(picture from here)

Guys, I’ve come across the best idea ever for hot chocolate-add nutella. I was on Pinterest yesterday to avoid studying for finals, and I came across a pin for Nutella hot chocolate.  It immediately caught my interest because Nutella is clearly one of the basic food groups, and I knew I had to make it.

I googled a bunch of different recipes for Nutella hot chocolate and tried the one I thought was best.  Obviously I chose one that had the highest Nutella to milk ratio (don’t act like you wouldn’t as well) and got to work.  I made it in my microwave since I don’t trust dorm kitchens, but I’m also including a recipe for the stove if you have your own place.  Enjoy this recipe and happy finals!


Stovetop Method:

NOTE: I haven’t tried the stovetop recipe, so let me know how it goes; (recipe from here)

Ingredients

-1 cup milk

-2½ Tbsp Nutella

-1 Tbsp Cocoa

Instructions

Combine all ingredients in a small sauce pan over medium heat and stir until it reaches your desired temperature.  Pour into a mug and enjoy.

Microwave method:

Ingredients:

1 cup milk (substitute hot water if absolutely necessary but it won’t be nearly as good)

2-3 T Nutella to taste

Instructions

Pour milk into microwave-safe cup and microwave for 1.5 minutes.  Add Nutella and microwave for 45 seconds-1 minute.

CAUTION: hot chocolate may be really hot when it’s finished for either recipe so be careful.  Feel free to decorate with marshmallows, whipped cream, sprinkles, or whatever you’d like.

Christmas Treats: Yule Log Cake and Chocolate Pecan Fudge

Image

Image

(photos from here and here)

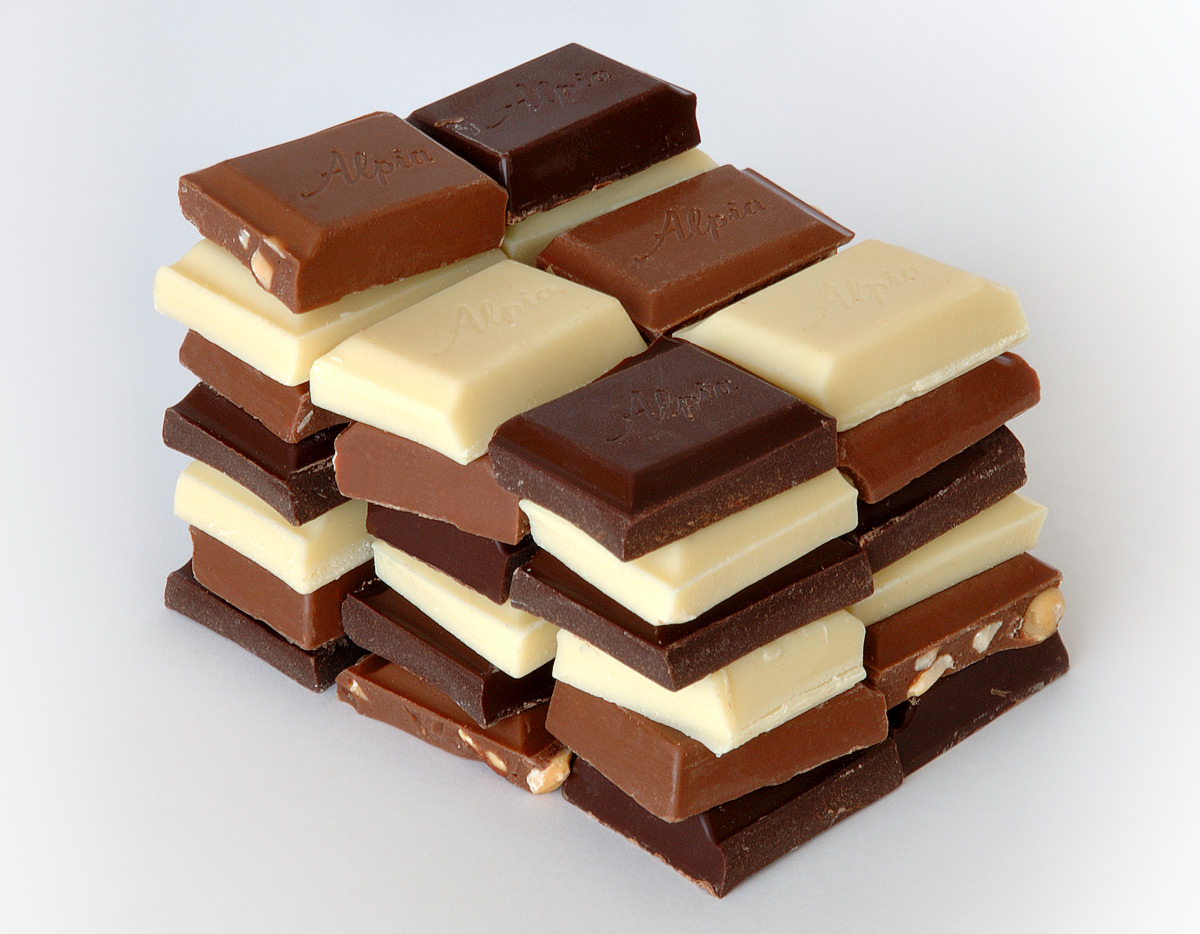
I know some people will get cranky that I’m doing a Christmas post before Thanksgiving, but I just need you guys to calm down for a second.  Christmas music keeps me in a happy mood during the stress of finals and huge projects this time of year, so I thought it’d be perfect to do a post on two of my favorite chocolate-related Christmas desserts.

My mom and I have made Christmas cookies and desserts an event for as long as I can remember.  I used to put on my red and blue striped pajamas as a kid and carefully sprinkle sprinkles onto the thin layer of white icing my mom carefully spread onto each gingerbread cookie.

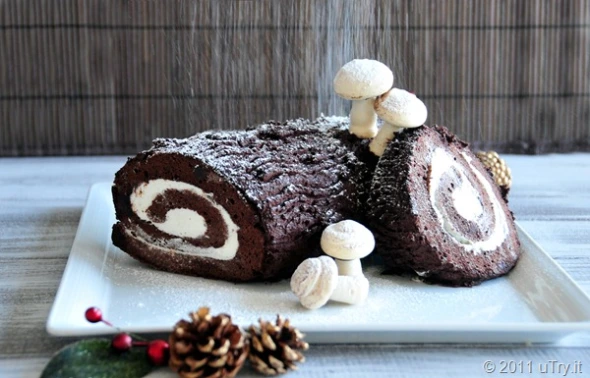
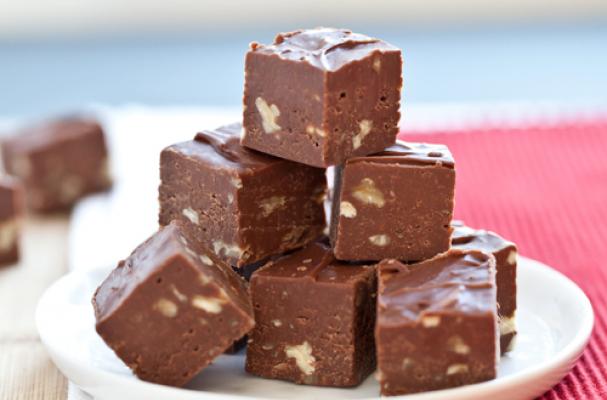
While I won’t be talking about gingerbread cookies in this post, I will be talking about two desserts I didn’t get to help with until I was a little bit older-chocolate fudge and our Yule Log cake.  They were a little more finicky for a little kid to help with, but man, it was such an exciting day when I was finally old enough to help her.

Here are two of my family recipes that you can try out and have time to perfect before this holiday season rolls around.  The fudge can be easily customizable if you don’t like nuts or if you want to throw in other chunky things like crushed up candy canes or raisins.  The Yule Log cake is delicious as well, and the best part is that even if it cracks a little when you’re rolling it up, a nice coating of frosting will disguise it.  Good luck!

Chocolate Butter Pecan Fudge

-3 Cups Sugar

-7 Ounces Marshmallow Crème

-¾ Cup Butter

-1 Cup Pecans

-2/3 Cup Evaporated Milk

-1 Teaspoon Vanilla

-12 Ounces Semi-Sweet Chocolate Chips

Combine sugar, butter, and milk in a heavy 2-1/2 quart saucepan; bring to full rolling boil, stirring constantly.  Continue boiling 5 minutes over medium heat or until candy thermometer reaches 234 degrees stirring constantly to prevent scorching.  Remove from heat; stir in chips until melted.  Add marshmallow crème, nuts and vanilla; beat until well blended.  Pour into greased 9 inch x 13 inch pan. Cool at room temperature, cut into squares. Yield 3 pounds.

Yule Log Cake

-1 cup walnuts, grated very fine

-¼ cup sifted flour

-¼ cup unsweetened cocoa powder

-5 eggs, separated

-½ teaspoon salt

-¼ teaspoon cream of tartar

-2/3 cup sugar

-½ teaspoon vanilla

-Sweetened whipped cream*

-Cocoa Glaze**

Line 10 x 15 x 1 pan with greased, waxed paper.

Mix ground walnuts with flour and cocoa.  Beat egg whites, salt and cream of tartar until barely stiff.  Gradually beat in 1/3 cup of sugar.  In separate bowl, beat yolks, remaining sugar, and vanilla until thick.  Pour yolk mixture over egg whites and gently fold together.  Gently fold walnut mixture into egg mixture.

Turn batter into 10 x 15 x 1 pan.  Bake at 350 degrees for 20 minutes or until top springs back.

Sprinkle dishcloth thickly with powdered sugar.  Turn out hot cake onto cloth.

Roll up loosely in cloth and leave to cool.

Gently unroll and spread with sweetened whipped cream.

Reroll and frost top and sides with cocoa glaze

* Beat 1 cup heavy cream, ¼ cup powdered sugar, and ½ teaspoon of vanilla. Fold in ¼ cup chopped candied cherries.

** Mix 2 teaspoons unsweetened cocoa, 2 teaspoons melted butter, and 1 ½ teaspoons of boiling water.  Stir in 1 tablespoon light corn syrup and ¾ cup of sifted powdered sugar.

Chocolate and Wine Pairings

Image

(photo from here)

When you think of a romantic evening, what are the first two things that pop into your head?  Maybe a lingering kiss or candlelight if you’re getting fancy, but wine and chocolate should be high up on the list.  While it seems like it’d be easy to drink wine and eat chocolate and have them taste good together, it’s actually more difficult than it seems.  At the risk of sounding like a wine snob (which I most certainly am not), chocolate and wine have “flavor profiles,” and you have to be careful when combining them so you get combinations that taste good.

When pairing wine and chocolate, you can make a choice to match the flavors or contrast them to make the individual flavor profiles pop.  Many people choose to match chocolate with wines that echo the fruity flavors found in most chocolates, but there is no need to limit yourself to those options.  Feel free to play around until you find combinations you like! Here are some that I’ve found are good as well as some that I’d like to try.

Pro tip #1: if you’re having a wine tasting and chocolate party, have plain crackers on hand for people to cleanse their palates between pairings.

Pro tip #2: Pair super rich chocolate desserts with a dessert wine like ruby port which is sweet but has enough body to match the intensity of the chocolate

Wine and Chocolate Pairing Suggestions

-White Chocolate: it’s pretty versatile because it doesn’t have any cocoa which accounts for the bitter taste that some chocolate has. Try a rosé port for a strawberry flavor, Riesling, or champagne for a nice compliment.

-Milk Chocolate: Milk chocolate has less cocoa than darker chocolate so it still is fairly versatile.  Pair it with sherry, a light merlot, or Riesling.

-Semisweet Chocolate: Since it has a stronger flavor, try port or cabernet sauvignon.

-Bittersweet Chocolate: Bittersweet chocolate is known for it’s intense chocolate flavor, so here come the heavy, full-bodied wines.  Zinfandel, cabernet sauvignon, and merlot make will compliment the more intense chocolate flavor nicely.  Chambord is also a nice combination.

-Dark Chocolate:  Since this is chocolate at it’s most intense, bust out the deep red wines.  Merlot, zinfandel, and bordeaux are nice options.

Let me know if you think of any pairings that would be good. Happy indulging!

See these websites for more wine and chocolate pairing suggestions! Click here, here, and here.

Should You Ever Substitute Types of Chocolate in a Recipe?

Image

(photo from here)

If you’re anything like me, the baking bug strikes frequently and without warning.  I don’t always have the ingredients I need on hand, especially when it comes to chocolate.  I can be kind of lazy sometimes and don’t want to go to the store and get the exact ingredients I need.  I’ve tried using chips when the recipe calls for bars and mixing dark and semisweet chocolate to get bittersweet chocolate, and I’m here to tell you what works and what gives you subpar results.

Substituting like this has never led to any bad results, but some will give you better results than others.  Here’s to avoiding unnecessary trips to the grocery store!


The Low Down on Chocolate

-Chocolate chips: These are pretty versatile little buggers.  Any time you want chocolate to keep its shape well, use chocolate chips.  They work best for cookie and bars.  The reason why they keep their shape so well is that they’re waxier than chocolate bars and contain more stabilizing ingredients.  They also don’t contain much (if any) cocoa butter so the chocolate doesn’t get fat blooms after baking.

I have melted chips to use for truffles and it works fairly well.  The chocolate doesn’t melt as smoothly because the chips are designed to hold their shape.  You normally have to heat the chocolate for longer so they all melt and then you run the risk of overheating the chocolate.  If you decide to use chips this way, heat the chocolate carefully with a double boiler.  (See my previous post on tempering chocolate)

-Chocolate bars: This is probably the most versatile form of chocolate.  Chocolate bars melt beautifully and are awesome for making truffles, ganache, and anything where you need to have smooth melted chocolate.  The higher the cocoa butter present in the chocolate, the more smoothly it will melt.  The most fantastic chocolate I’ve ever worked with was some white chocolate bars I got from Waitrose in London that had a 100% cocoa butter content.  They melted like a dream.

Before you use bars for anything, you should chop them up into small pieces, especially if you’re melting them.  This will help the chocolate melt more quickly and maintain an even heat. Plus you can steal a square or two when you’re cutting up the chocolate!  You can substitute bars for anything unless the chocolate specifically needs to hold its shape (ie chocolate chip cookies).

-Baking chocolate: As far as I’m concerned, baking chocolate is a cruel joke to children everywhere.  I snuck a square as a kid and bitterly regretted it.  For those of you who don’t know, baking chocolate is completely unsweetened as is actually quite bitter.  Definitely wasn’t the sweet taste I was expecting as a kid.

There really isn’t any way you can get around using this.  If you run out, go to the store and buy more.  Any other chocolate you try to substitute will be way too sweet.  You can substitute cocoa powder if you’re short on time, but it’s better to have the real thing.

-Cocoa: I don’t use this much in recipes because it can be bitter and I prefer just using regular chocolate.  I love using it for dusting desserts or rolling truffles.  Substitute 3 T of cocoa powder + 1 T of oil for 1 oz. unsweetened chocolate

-Candy melts: I really don’t like these.  I know they melt perfectly smooth in no time, but they aren’t really chocolate! They taste fake, and I’m not really a fan.

Quick guide:

-Run out of white chocolate? Go buy more

-Run out of milk chocolate? Use semisweet but it won’t be as sweet

-Run out of semisweet chocolate? Use 1/2 milk chocolate to 1/2 dark or bittersweet

-Run out of dark chocolate? Use bittersweet or ¾ baking chocolate to ¼ milk chocolate in a pinch

-Run out of baking chocolate? Go buy more

Chocolate Chip Pumpkin Bread

Image

(Photo from here)

You know what I love most about fall other than bonfires and jumping in fall leaves? (Yes I’m secretly five years old. Don’t judge)  Pumpkins. They’re seriously the best.  I love pumpkin flavored candy, pumpkin spice lattes, and carving pumpkins in general.  I’ve been carving all my family’s pumpkins for years, but that’s another story.

Pumpkin bread is seriously the shit.  It doesn’t matter whether it is plain, contains nuts, or has cream cheese slathered on it.  When I found a recipe that combined two of my favorite things, chocolate and pumpkin bread, I knew I’d hit the jackpot.

This is one of the simplest recipes you could ever try to make and that’s why it’s so perfect.  Whip up a quick batch before your kids get home from school or when you’re super stressed out and feel like baking (basically me every day of finals week).

This recipe can also be revised if you feel like being healthier or if you want a gluten-free alternative.  Substitute ½ cup of applesauce for ½ cup of the vegetable oil and you have a heart healthy alternative.  You can also reduce the cinnamon and nutmeg measurements to 1 tsp. each if you want a pumpkin bread that isn’t as spicy.  Although I haven’t tried this, one reviewer said she had good results substituting gluten-free all-purpose flour for the normal flour and egg whites for the eggs and still got good results.  Let me know if you try this!

Chocolate Chip Pumpkin Bread

-3 cups white sugar

-1 (15 ounce) can pumpkin puree

-
1 cup vegetable oil

-
2/3 cup water

-
4 eggs

-
3 1/2 cups all-purpose flour

-1 tablespoon ground cinnamon

-1 tablespoon ground nutmeg

-2 teaspoons baking soda

-1 1/2 teaspoons salt

1 cup miniature semisweet chocolate chips

1/2 cup chopped walnuts (optional but definitely delicious)

Directions

  1. Preheat oven to 350 degrees F. Grease and flour three 9×5 inch loaf pans.
  2. In a large bowl, combine sugar, pumpkin, oil, water, and eggs. Beat until smooth.
  3. Blend in flour, cinnamon, nutmeg, baking soda, and salt. Fold in chocolate chips and nuts.
  4. Evenly distribute the batter between the three greased pans.
  5. Bake for 1 hour, or until an inserted knife comes out clean. Cool on wire racks before removing from  pans.

Serve with cream cheese or pumpkin butter for an awesome snack. Munch away!

(Recipe from here)

Dressing Up Your Drinks: Hot Chocolate Add-Ins

Image

(photo from here)

Let me just preface this post by saying I’m pretty much obsessed with hot chocolate.  Every month and a half or so when I went home during my freshman year at Drake, I’d have my mom buy me a new can of hot chocolate mix and of chai tea latte mix.  I go through them at an embarrassing rate, but I figured hot chocolate would be a great thing to post on since I consume so much of it.

My absolute favorite hot chocolate of all time is Trader Joes’ Peppermint Hot Chocolate that they sell around Christmas in green cylindrical metal tins.  It’s full of slivers of actual chocolate and pepperminty bliss.  Get your hands on some if you can around the holidays because it’s a limited edition cult favorite, and it tends to sell out quickly.

For the most part though, I’m not too picky about my hot chocolate because it’s easy to dress it up.  You can make any packet of Swiss Miss hot chocolate taste gourmet if you jazz it up enough.  Here are some tricks I use to dress up my hot chocolate beyond your basic marshmallows and a few I’d like to try.

Hot Chocolate Add-Ins

  1. Peppermint.  Whether you choose to go the old fashioned way and add candy canes to infuse in the peppermint flavor or whether you add peppermint extract or a shot of peppermint schnapps, peppermint has been associated with hot chocolate since pretty much forever.  It’s a traditional flavor for a reason-it complements hot chocolate beautifully.
  2. Orange.  If you’ve never had a chocolate orange in your stocking around Christmas, you’ve had a deprived childhood.  “Santa” would always put a chocolate orange in my and my siblings’ stockings, and it was always my favorite part of my stocking each year.  To mimic the delicious flavors of a chocolate orange, you can add ½-1 tsp of orange extract to your hot chocolate or you can add orange zest if you’re making hot chocolate on the stove.  Add ¼ T of fresh orange zest for every ½ cup of hot cocoa and strain before serving to remove the rind.  Now you have a drinkable chocolate orange!
  3. Cinnamon and/or cayenne pepper.  Now I’m not personally a huge fan of this one, but a lot of people like the “Mexican style” hot chocolate.  Add a pinch of each (1/2 tsp or so) to your cup of cocoa for a bit of a kick.
  4. Booze.  I wouldn’t be adequately covering hot chocolate add-ins if I didn’t mention ways to spike your drink.  Baileys Irish Cream is always a safe option, as is amaretto for that nutty flavor.  You can basically add any flavor of liquor you’d like, from Chambord to give your cocoa a fruity edge to Malibu which my grandma swears by to infuse a little coconut flavor.
  5. Pumpkin.  While I’ve never personally tried pumpkin hot chocolate, this one definitely caught my eye.  Maybe it’s just me being a typical white girl and being obsessed with Uggs, iPhones, and all things pumpkin, but I think it sounds delicious.  Mix 1-2 T of pumpkin puree into your cocoa and put whipped cream and cinnamon on top.  You probably want to try this out when you’re making a pie or making a lot of hot chocolate, otherwise you’ll have a partially used pumpkin puree sitting in your fridge for awhile.

Enjoy! Let me know in the comments below what your favorite hot chocolate add-in is so I can get some new ideas.

Q and A with Art By Chocolate owner Lee Reizian Holmes

Image

(photo from here)

I had a lovely interview Wednesday evening with Lee Reizian, the owner of the seven-year-old artisanal chocolate business called Art by Chocolate.  Located in Washington, D.C., Art by Chocolate specializes in handcrafted and hand-painted chocolate flower arrangements as well as chocolate leaves and flowers for party favors and dessert/drink embellishments.  They also do custom orders, and their products can be found in Dean & DeLuca as well as Neiman Marcus.  See http://www.artbychocolate.com for more details and follow founder/chocolate artesian extraordinaire Lee on Twitter at @ChocolateArtist. Enjoy the interview!


What led you to open Art By Chocolate?

“It started with my daughter having a school-wide event, and I just I couldn’t make another batch of brownies. When we were at Michaels, I thought ‘maybe I’ll get some molds and try making something with chocolate.’  I’m a painter, and I thought, ‘what if I could paint chocolate?’  We bought candy melts, and I made these little chocolate flowers that were really artistic and hand-painted and they sold like crazy.  People were coming up and asking if this was what I did, and I decided that I could do this and taught myself how to deal with chocolate and create unique designs.”

How do you make the flowers?  Are they done with molds or are they made some other way?

“They’re all molded, but they’re done by hand, and the quality of the chocolate we use is incredibly high grade.  We sell to Dean & DeLuca and Neiman Marcus retail stores across the country and do gala events for Neiman Marcus. It’s not easy to be sold in these kinds of stores.  You have to produce something that’s very unique and very high quality and that’s what we do.

We also do cocktail garnishes and sell to casinos in Las Vegas.  We do edible metallics like chocolate gardenia leaves imbedded with 24 carat gold flakes because they’re totally glam and cool.  It’s been a very interesting and daring experience because I’ve put things out on the market that nobody does.  I’m competing against all the truffle people who make these fabulously tasty chocolates but I am an artist.  That’s why my company is called Art by Chocolate.  Chocolate is the medium of my art.”

Tell me about your custom orders. 

“Art by Chocolate was really founded because of the fact that the design aspect is customizable. We love working with anyone from a bride to a bat mitzvah to a hotel; it doesn’t matter because everyone has a color theme.  We have a really collaborative relationship with all of our clients, and that’s really important to me.  I’ve had brides send me swatches of stuff so that we can match the colors perfectly to their color scheme.  That really appeals to the artist in me because it gives us the unique ability to create things that no one else can really do.”

What makes your chocolate worth the price? 

“It’s not just pretty.  You know that beautiful cookie that you buy for like $5-$6 but once you bite into it, the decorations taste horrible?  I was not going to have a company that did that.  My stuff was not only going to look good, it was going to taste good because that’s the most important thing.  I only use the finest gourmet chocolate because if you spend that kind of money, you deserve the best.  My chocolate is $60/pound, so I want it to be your happy indulgence.”

Do you have any tips/suggestions for people looking to start a business around chocolate/desserts?

“I think it’s a good idea to have a unique angle on things.  You can’t just be another person who makes cake pops.  I think the reason why Art by Chocolate has been successful is that we do something that no one else does.  Change the perspective of people and surprise them because people are absolutely willing to pay for something unique.  Be inspired.  People are more open-minded to try things than you’d ever believe.  This is a foodie nation now.”


Top 5 Health Benefits of Chocolate: (AKA Your Excuse to Eat More)

Image

(Photo from here)

If you couldn’t tell already, chocolate and I have an unhealthy relationship.  Just like that boy you keep coming back to when you know you shouldn’t, chocolate is always there for me on my worst days.  Staying up late to cram for a midterm? Eat chocolate.  Dealing with friend drama when all you want is for them to get alone? Eat chocolate.  It’s amazing how a little square of chocolaty goodness can turn your day around.

The good news is that chocolate doesn’t just have to be for when you’re having a crappy day. According to new medical research, chocolate has some health benefits for you! No, I’m not just saying this so I can eat more chocolate (although I gladly will).  Here is a list of five reasons why chocolate is good for you so you can justify that square or two (or bar) you sneak.

Top 5 Health Benefits from Chocolate

1.  Chocolate protects us from UV rays  and other environmental hazards as a result of the flavonoids (aka antioxidants).

**Helpful tip: the more processed the chocolate, the fewer antioxidants it has in it so avoid chocolate that is super processed if you want the maximum health benefits

Click here for more info

2.   Chocolate reduces heart disease thanks to those helpful flavonoids.  Cell damage is reduced, blood pressure is lowered and you get better vascular function.

**Helpful tip: the darker the better.  Dark chocolate with at least 65% cocoa is healthier for you than milk or white chocolate

 Click here for more info

3.  Chocolate makes you happy.  It contains a chemical called phenylethylamine which helps you release endorphins which improve your mood and make you happy.

**Fun fact: phenylethlamine is also released in your brain when you’re falling in love

 Click here for more info

4.  Dark chocolate doesn’t cause huge blood sugar spikes.  It helps your body use insulin efficiently and it has a low glycemic index which means it’s safer for diabetics than other types of chocolate because it doesn’t cause big blood sugar spikes.

        Click here for more info

5.  Chocolate may help reduce fatigue.  Chocolate stimulates neurotransmitters like serotonin which controls moods and sleep, and a study done in England reported that 1.5 oz of 85% or darker chocolate helped people feel less fatigued after eating it.

        Click here for more info

Now you can eat a bar of chocolate and not feel so horrible about yourself.  Here’s to not feeling guilty about our little indulgences!

Three Layer Peppermint Bark

peppermint-bark

(photo from here)

This is probably the best peppermint bark I’ve ever had in my life, and it’s all because of the three delicious layers of chocolate.  It’s not the cheapest thing in the world to make because of the huge quantities of chocolate, but it’s absolutely worth it.

My mom and I usually make it around Christmas as part of our multi-day baking bonanza.  We’ve only been making it for two or three years since I found the recipe here, but my family has been requesting it every year since.  The chocolate ganache in the middle is fantastic and sets off the sweetness of the white chocolate perfectly.  Remember to store the peppermint bark in the fridge to ensure maximum freshness and to remove at least 20 minutes before serving so it can soften up a bit.

I still haven’t figured out a way to cut the peppermint bark into perfect triangles like it’s shown in most photos, so if you have any tips, please let me know! The best way I’ve found so far is to run a large knife under boiling water before making the cuts and to let the peppermint bark soften for 10-15 minutes before you try to cut it.  It still fragments a bit, but it’s a lot better than cutting it cold.  Enjoy!

Three Layer Peppermint Bark

Ingredients

.    20 ounces white chocolate, coarsely chopped, divided

.    30 peppermint candies, crushed, divided (candy canes fragment more easily but starlight mints will also work)

.    10 ounces dark chocolate, coarsely chopped

.    6 tablespoons heavy cream

.    1 teaspoon peppermint extract

  1. Line a 9×12 inch baking pan with aluminum foil or parchment paper.
  2. Melt half of the white chocolate in the top of a double boiler over just barely simmering water, stirring frequently and scraping down the sides with a rubber spatula to avoid scorching. Spread the white chocolate into the prepared pan. Sprinkle 1/4 of the crushed peppermints evenly over white chocolate. Chill until firm, about 15 minutes.
  3. Meanwhile, melt the dark chocolate, heavy cream, and peppermint extract together in the top of a double boiler over just barely simmering water, stirring frequently, until just melted. Quickly pour the chocolate layer over the chilled white chocolate layer; spread evenly. Chill until firm, about 20 minutes.
  4. Meanwhile, melt the remaining white chocolate in the top of a double boiler over just barely simmering water, stirring frequently, until just melted. Spread quickly over the chilled bark. Sprinkle with the remaining peppermint pieces; chill until firm, about 20 minutes. Cut into small pieces to serve.

How to: Tempering Chocolate

Image

(photo from here)

If you hope to do any sort of work with chocolate, learning how to properly heat and temper it is essential.  For those of you who are unaware, tempering chocolate gives chocolate that beautiful shiny finish that we associate with store-bought chocolate and sometimes struggle to replicate at home.  Worst of all, if the chocolate is tempered incorrectly, it can get fat blooms where the cocoa fat separates from the rest of the chocolate and makes the chocolate look gross and moldy.  Knowing how to properly temper is important or no one will eat what you make.

Now depending on the type of chocolate, you may be able to get away with heating it in the microwave to melt it, (especially if it is cheaper chocolate like Hershey’s that has a higher wax content), but I would recommend using a double boiler instead because it is easier to control the temperature and not seize or overheat the chocolate.  If you don’t have a double boiler, you can always stack a metal mixing bowl in a similar size saucepan as long as you leave at least an inch or two between the bottom of the bowl and the water so it has room to boil.

Fill the bottom pot with several inches of water (making sure it remains at least an inch or two below where the bottom of the top pan hits) and heat it to a rolling boil.  Turn the heat down low and place the mixing bowl or the top pan to the double boiler on top.  The chocolate goes in the top pan, and it will melt better if it is finely chopped.  Set aside around ¼ of the chocolate you need for “seed chocolate” to help it temper properly and melt the rest.

While it’s melting, stir consistently but gently to prevent the chocolate from burning and sticking to the sides.  Be careful not to get ANY water or steam in the chocolate or it will seize up and be ruined.  Oil (ie cocoa fat) and water don’t get along, so keep them apart unless you want a fight breaking out on your hands.

Everyone has different temperatures they like to temper chocolate at. The typical temp range for milk chocolate is 112-116 degrees F, white chocolate is 113-115 degrees, and dark chocolate is 118-120 degrees.  The best way to test this is to put a digital or candy thermometer into the chocolate as it’s melting.

Once it’s in the correct range, take the chocolate off the heat and add the reserve chocolate.  Stir until smooth and the chocolate cools to about 89-90 degrees F for dark chocolate, 86-88 degrees for milk, and 82-83 for white.  It’s ready for dipping!

The process seems a little complicated at first, but once you’ve done it before, it’s not too difficult.  It makes gorgeous chocolate that will hold up well for dipping and whatever else you plan on doing with it.  Good luck!